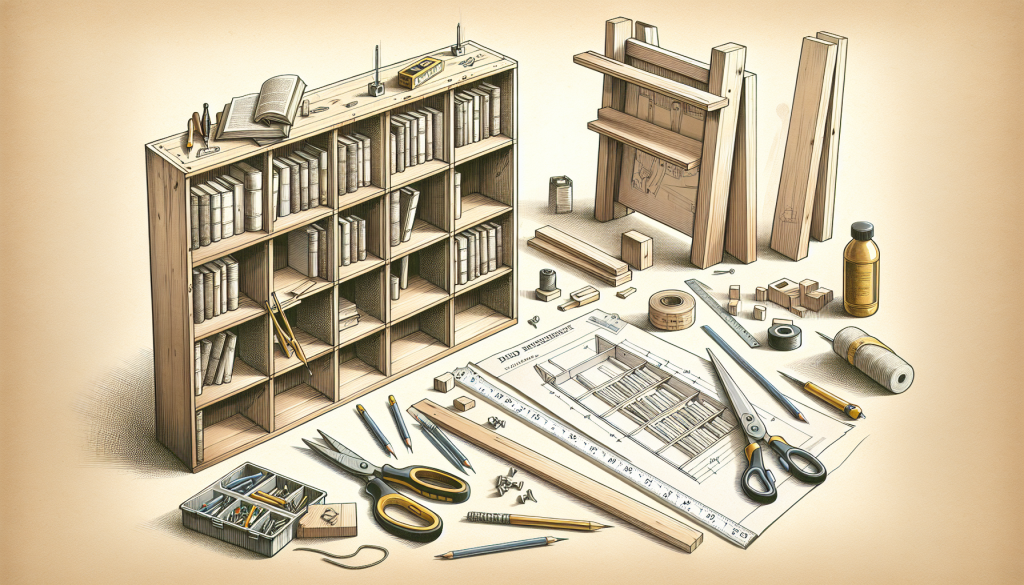
So, you’ve finally decided to create your own home library and now you’re wondering how to build a DIY bookshelf to display all those precious books you’ve collected over the years. Well, look no further! In this article, we will guide you through the step-by-step process of constructing a bookshelf that not only complements your home decor but also provides a functional and stylish storage solution for your beloved book collection. Get ready to unleash your inner DIY enthusiast and let’s dive into the wonderful world of building a custom bookshelf for your home library!
Table of Contents
ToggleChoosing the Design and Size of the Bookshelf
When it comes to building a DIY bookshelf for your home library, one of the first things you need to consider is the design and size of the bookshelf. This will depend on the available space in your home and your personal preferences.
Considering the available space
Before you start building your bookshelf, take some time to assess the available space in your home. Look for a suitable area where the bookshelf will fit comfortably without obstructing any doorways or windows. Measure the height, width, and depth of the space to ensure that your bookshelf will fit perfectly.
Exploring different bookshelf designs
Once you have determined the available space, it’s time to explore different bookshelf designs. There are numerous design options to choose from, ranging from traditional wooden bookshelves to more modern and minimalistic designs. Consider the overall style and aesthetic of your home when selecting a design. You can browse through books, magazines, or even online platforms to gather inspiration and ideas.
Gathering the Materials and Tools
After finalizing the design and size of your bookshelf, the next step is to gather all the necessary materials and tools. Making a list of required materials will help you ensure that you have everything you need before you begin the building process. Here are some common materials needed for building a bookshelf:
- Wood boards (of the desired type and thickness)
- Screws or nails
- Wood glue
- Sandpaper
- Stain or paint (optional)
- Decorative elements (optional)
Additionally, make sure to collect all the necessary tools to complete the project. A few basic tools you may need include:
- Saw (circular or miter)
- Drill
- Screwdriver
- Measuring tape
- Clamps
- Sanding block or electric sander
Taking Accurate Measurements
Accurate measurements are crucial to ensure that your DIY bookshelf fits perfectly in the designated space and meets your requirements. Take the time to measure the height, width, and depth of your bookshelf.
Determining the height, width, and depth
Measure the height from the floor to the desired height of the bookshelf. Remember to leave enough space between the bookshelf and the ceiling to prevent any potential damage. Next, measure the width and depth of the bookshelf. These dimensions will determine how many books and other items your bookshelf can hold.
Considering shelf spacing
When planning your bookshelf, consider how you want to space the shelves. Think about the types of books and other items you will be placing on the shelves. If you have larger books or decorative items, you may need to adjust the spacing between the shelves accordingly.
Measuring the wall for installation
Before you start building, it’s important to measure the wall where you plan to install the bookshelf. This will help you ensure that the bookshelf will be level and secure once it’s attached to the wall. Take precise measurements of the wall height and width, and use these measurements as a guide during the assembly process.
Preparing the Workspace
To begin building your DIY bookshelf, it’s essential to prepare a suitable workspace. Clear the area where you plan to build the bookshelf, removing any debris or objects that may hinder your progress.
Clearing the area
Make sure the floor is clean and free of any obstacles. Remove any furniture or items that may interfere with your construction process. This will give you ample space to work and ensure your safety during the building process.
Setting up a workbench or table
Having a designated workbench or table is highly recommended when building a bookshelf. It provides a sturdy and stable surface for cutting and assembling the bookshelf pieces. Set up your workbench or table in the cleared area, ensuring that it is level and strong enough to support the weight of the materials.
Cutting the Wood
Once you have prepared your workspace, it’s time to cut the wood boards to the necessary dimensions. Choosing the right type of wood is important to ensure the durability and strength of your bookshelf.
Choosing the right type of wood
When selecting the wood for your bookshelf, consider both the aesthetic appeal and the practicality of the material. Solid wood boards, such as pine or oak, are popular choices due to their strength and natural beauty. However, plywood or MDF (medium-density fiberboard) can be more affordable and easier to work with for beginners.
Cutting the boards to the necessary dimensions
Using a saw, carefully cut the boards to the desired height, width, and depth of your bookshelf. Double-check your measurements and make precise cuts to ensure a clean and precise fit. Take your time during this step, as accuracy is crucial for the overall stability and appearance of the bookshelf.
Sanding the Wood Pieces
After cutting the wood pieces, it’s important to sand them to create a smooth and polished surface. This step will not only improve the overall look of the bookshelf but also prevent any potential splinters or rough edges.
Smoothing out any rough edges
Using sandpaper, gently sand the cut edges of the wood boards. Focus on any rough or uneven areas, ensuring that they are smooth to the touch. This will not only enhance the safety of your bookshelf but also give it a professional and finished look.
Creating a clean and polished surface
Continue sanding the entire surface of the wood boards, making sure to remove any imperfections or rough patches. A sanding block or an electric sander can help streamline the process and ensure a consistent finish. Start with a rough grit sandpaper and gradually switch to finer grits for a smoother result.
Assembling the Bookshelf
With the wood pieces sanded, it’s time to start assembling your DIY bookshelf. This step involves attaching the sides to the base and installing the backboard and shelves.
Attaching the sides to the base
Using wood glue and screws, attach the sides of the bookshelf to the base. Secure the pieces tightly, ensuring that they are level and aligned properly. A drill can be helpful to create pilot holes before inserting the screws, preventing any splitting or damage to the wood.
Installing the backboard and shelves
Next, install the backboard of the bookshelf. This can be done by nailing or screwing the backboard to the sides and base of the bookshelf. Double-check the alignment and stability of the backboard before proceeding.
Once the backboard is in place, it’s time to install the shelves. Measure and mark the desired spacing for each shelf and attach them to the sides of the bookshelf using screws or nails. Make sure the shelves are level and securely attached to support the weight of your books.
Securing the Bookshelf
To ensure the safety and stability of your DIY bookshelf, it’s crucial to secure it to the wall. This step is especially important if you have children or pets in your home, as it will prevent the bookshelf from accidentally tipping over.
Attaching the bookshelf to the wall
Using a drill and appropriate wall anchors, attach the bookshelf to the wall. Locate the wall studs and mark their positions on the bookshelf. Drill pilot holes and insert the wall anchors, then secure the bookshelf to the wall using screws or nails. Consider using brackets or L-brackets for additional support, especially for taller or heavier bookshelves.
Checking for stability
Once the bookshelf is secured to the wall, give it a gentle shake to ensure that it is stable and doesn’t wobble. If you notice any instability, reinforce the attachment to the wall or adjust the placement of the screws or nails. It’s essential to have a stable bookshelf to prevent any accidents or damage to your books.
Applying Finishing Touches
Now that your bookshelf is assembled and secured, it’s time to add some finishing touches to enhance its appearance. Staining or painting the bookshelf is a popular option to protect the wood and give it a polished look.
Staining or painting the bookshelf
Choose a stain or paint color that complements your home decor and personal style. Before applying the stain or paint, make sure to sand the surfaces lightly to remove any dust or imperfections. Follow the manufacturer’s instructions for the staining or painting process, applying the desired number of coats for the desired finish. Allow the bookshelf to dry completely before proceeding to the next step.
Adding decorative elements (optional)
To further personalize your bookshelf, consider adding decorative elements such as trim, molding, or decorative hardware. These additional touches can elevate the visual appeal of your bookshelf and make it a unique centerpiece in your home library. Explore different options and find elements that match your personal style and the overall aesthetic of your space.
Organizing and Decorating the Bookshelf
With your DIY bookshelf complete, it’s time to organize and decorate it to create a visually appealing and functional home library.
Arranging books by genre or author
Consider organizing your books by genre, author, or any other system that works best for you. This will make it easier to locate specific books and create a visually pleasing arrangement. Experiment with different arrangements and find the one that suits your personal preferences and makes your books easily accessible.
Adding personal touches like decorations or plants
To make your bookshelf truly your own, don’t forget to add personal touches like decorations or plants. You can display cherished personal items, family photos, or decorative accessories to give your bookshelf a unique and personalized touch. Adding a few potted plants can also bring a touch of nature and life to your home library.
Building a DIY bookshelf for your home library can be a rewarding and fulfilling project. By following these steps, from choosing the design and size to organizing and decorating the bookshelf, you can create a functional and visually appealing space to store and display your books. So roll up your sleeves, gather the materials and tools, and embark on this exciting DIY journey to build the bookshelf of your dreams. Happy building!

