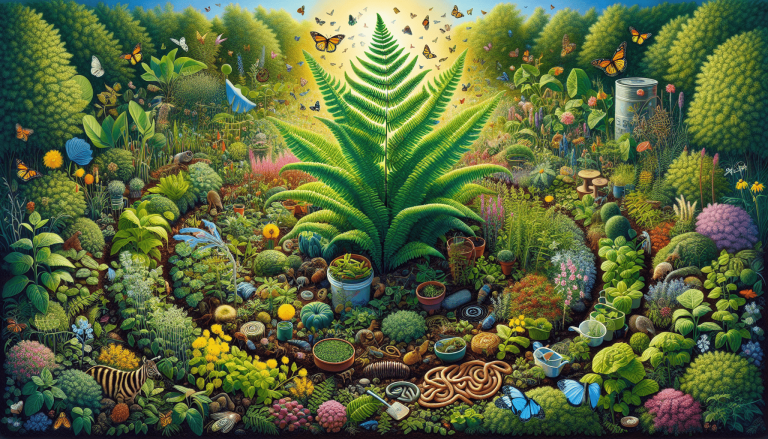
So you’re looking to make your own compost at home? It’s easier than you think! Composting is a simple and sustainable way to turn your kitchen scraps and yard waste into nutrient-rich soil for your plants. All you need is a little bit of space, the right ingredients, and a little patience. With just a little effort, you’ll be well on your way to creating your very own black gold that will have your garden thriving in no time.

Choosing a Composting Method
When it comes to composting, there are several methods to choose from. Each method has its own benefits and considerations, so it’s important to understand the options available to you.
1.1 Traditional Composting
Traditional composting is a popular and widely-used method that involves creating a compost pile or bin outdoors. This method relies on natural decomposition processes to break down organic materials into nutrient-rich compost. It involves layering a mix of green and brown materials, such as fruit and vegetable scraps, yard waste, and leaves. Over time, microorganisms and worms in the soil break down these materials, creating a dark, crumbly compost.
Traditional composting is a low-maintenance method that requires little intervention once the pile is established. It is ideal for those with ample outdoor space and a steady supply of organic waste. However, it can take several months to a year for the materials to fully decompose, so patience is key with this method.
1.2 Vermicomposting
Vermicomposting, also known as worm composting, is a method that involves using special composting worms to break down organic materials. This method is well-suited for those who do not have access to outdoor space or prefer a more compact composting system.
To start vermicomposting, you will need a worm bin or container equipped with proper ventilation and drainage. Red worms, or Eisenia fetida, are commonly used for vermicomposting. These worms feed on organic waste and produce nutrient-rich castings, also known as worm castings or vermicast.
Vermicomposting is typically faster than traditional composting, with the organic materials being broken down within a few months. It is also more odorless and convenient, making it a great option for apartment dwellers or those with limited outdoor space.
1.3 Bokashi Composting
Bokashi composting is a unique method that involves fermenting organic waste using a special mix of beneficial microorganisms. This method is popular for its ability to quickly break down both kitchen scraps and meat, dairy, and oily items that may not be suitable for traditional composting.
To start bokashi composting, you will need a bokashi bucket or bin and a supply of bokashi bran, which contains the beneficial microorganisms. As you add organic waste to the bin, you sprinkle a handful of bokashi bran and tightly seal the container to create an anaerobic environment for fermentation. The waste is fermented for several weeks, after which it can be buried in the soil or added to a traditional compost pile to complete the decomposition process.
Bokashi composting is a versatile and odorless method that works well for those who generate a significant amount of kitchen waste and want to divert it from the landfill. It is also a great option for those with limited space or who live in urban areas.
Creating a Compost Bin
Once you have chosen a composting method that suits your needs, the next step is to create a compost bin. A compost bin provides a controlled environment for the composting process and helps contain the materials while ensuring proper aeration and drainage.
2.1 Selecting the Right Container
When selecting a container for your compost, there are a few key factors to consider. The size of the container should be proportional to the amount of organic waste you generate. If you have a large garden or generate a significant amount of waste, a larger bin or multiple bins may be necessary. Consider the available space in your garden or the area where you plan to place the bin.
The material of the container is also important. Common options include plastic bins, wooden bins, or wire mesh bins. Plastic bins are lightweight, durable, and easy to move around if needed. Wooden bins may blend in better with your garden and provide better insulation. Wire mesh bins allow for better aeration and drainage but may require additional reinforcement.
2.2 Preparing the Container
Before adding any materials to your compost bin, it’s important to prepare the container properly. Start by ensuring that the bottom of the bin has adequate drainage holes to prevent water from collecting and causing the compost to become waterlogged. These drainage holes will allow excess water to escape and air to circulate.
Next, consider adding a layer of coarse materials to the bottom of the bin, such as twigs or small branches. This helps create a buffer between the compost materials and the drainage holes, promoting better airflow and preventing them from getting clogged.
2.3 Adding a Drainage System
In addition to the drainage holes, you may want to consider adding a drainage system to your compost bin. This can be as simple as placing a tray or container underneath the bin to catch excess moisture. Alternatively, you can elevate the bin on bricks or blocks to allow water to flow freely underneath.
A proper drainage system helps prevent the compost from becoming waterlogged, which can lead to unpleasant odors and slow decomposition. It also ensures that excess moisture does not leach into the soil or surrounding areas.
Collecting Compostable Materials
Now that your compost bin is ready, it’s time to start collecting the materials you will need to create your compost. Compostable materials can be divided into two categories: green materials and brown materials. It is important to maintain a balanced ratio between these materials for optimal composting.
3.1 Green Materials
Green materials, also known as nitrogen-rich materials, provide a source of nitrogen for the composting process. These materials are typically moist and include items such as fruit and vegetable scraps, coffee grounds, tea leaves, fresh grass clippings, and plant trimmings. Green materials are important for maintaining the proper moisture level in your compost pile and providing essential nutrients.
When collecting green materials, it’s important to avoid adding meat, dairy, and oily items, as they can attract pests and slow down the composting process. These materials are best suited for bokashi composting, as mentioned earlier.
3.2 Brown Materials
Brown materials, also known as carbon-rich materials, provide a source of carbon for the composting process. These materials are typically dry and include items such as dry leaves, straw, shredded newspaper, cardboard, and wood chips. Brown materials help create air pockets in the compost pile and provide structure.
Collecting brown materials can be as simple as saving dry leaves or shredding newspaper and cardboard. It’s important to avoid adding glossy or colored paper, as they may contain chemicals that should not be added to your compost.
3.3 Avoiding Certain Items
While there are many materials that can be composted, there are some items that should be avoided. These include meat, dairy, oily items, and highly invasive weeds or plants. These materials can attract pests, produce odors, and may not break down properly in the composting process.
It’s also important to avoid adding diseased or pest-infested plant material to your compost. This can spread the disease or pests to your garden when you eventually use the compost.
By collecting a balance of green and brown materials while avoiding certain items, you can ensure a healthy and productive compost pile.
Building the Compost Pile
With your collected compostable materials and a properly prepared compost bin, it’s time to start building your compost pile. Building a compost pile involves layering the materials in a specific manner to promote decomposition and create an ideal environment for microorganisms.
4.1 Layering the Materials
Start by adding a layer of brown materials to the bottom of the compost bin. This helps provide structure and allows for better airflow. Aim for a layer that is about 4 to 6 inches thick.
Next, add a layer of green materials on top of the brown layer. This provides the nitrogen-rich component needed for decomposition. Again, aim for a layer that is about 4 to 6 inches thick.
Continue alternating between brown and green layers until you have used up all your compostable materials. Ideally, you should end with a layer of brown materials on top to help retain moisture and prevent odor.
4.2 Maintaining the Right Ratio
Maintaining the right ratio of green to brown materials is important for successful composting. The ideal ratio is roughly 3 parts brown materials to 1 part green materials. This balance ensures that there is enough carbon for the microorganisms to break down the nitrogen-rich materials.
If your compost pile seems too dry, add more green materials or water to increase the moisture content. If it seems too wet and a bit smelly, add more brown materials to absorb the excess moisture and balance the carbon-nitrogen ratio.
It’s important to note that the compost pile should be moist, similar to a damp sponge, but not soaking wet. A properly maintained compost pile should feel warm to the touch, indicating that the decomposition process is actively taking place.

Managing the Compost Pile
Now that your compost pile is set up, it’s important to manage it properly to ensure optimal decomposition and avoid common issues.
5.1 Turning the Pile
Turning or aerating the compost pile helps mix the materials and expose them to air, promoting decomposition. This can be done by using a pitchfork or shovel to carefully turn the pile every few weeks. Turning the pile also helps distribute moisture and temperature evenly, ensuring that all parts of the pile are decomposing at a similar rate.
While turning the pile is not necessary for vermicomposting or bokashi composting, it is beneficial for traditional composting and can help speed up the process.
5.2 Monitoring Moisture Level
Proper moisture is essential for composting. It’s important to monitor the moisture level of your compost pile regularly. If the pile feels dry, add water to increase the moisture content. If it feels too wet, add more dry brown materials to absorb the excess moisture.
A moisture level similar to a damp sponge is ideal. Too much moisture can lead to a smelly pile and slow decomposition, while too little moisture can inhibit the activity of microorganisms.
5.3 Adjusting Carbon-Nitrogen Ratio
As mentioned earlier, maintaining the right carbon-nitrogen ratio is crucial for successful composting. If your compost pile seems to be slow to decompose or has a strong odor, it may be a sign that the ratio is off.
If the pile is too nitrogen-rich, or “hot,” add more brown materials to balance it out. If it’s too carbon-rich, or “cold,” add more green materials or a nitrogen-rich compost accelerator to speed up decomposition. Finding the right balance may require some trial and error, but the end result will be nutrient-rich compost for your garden.
Accelerating the Composting Process
If you’re eager to see results faster, there are several techniques you can employ to accelerate the composting process.
6.1 Shredding Materials
Shredding or chopping the compostable materials into smaller pieces can help speed up decomposition. This increases the surface area available for microbial activity and breaks down the materials more quickly.
Consider running your kitchen scraps through a blender or food processor before adding them to the compost pile. Similarly, shred leaves and other brown materials before layering them into the pile.
6.2 Adding Compost Accelerators
Compost accelerators, also known as compost starters or activators, are products that contain a high concentration of beneficial microorganisms. These microorganisms help break down the organic materials more rapidly and effectively.
You can purchase compost accelerators from garden centers or make your own by adding a small amount of finished compost or garden soil to the pile. Just sprinkle the accelerator on each layer of the compost pile to introduce the microorganisms.
6.3 Proper Aeration
Proper aeration is crucial for the composting process. Adding air to the compost pile helps the microorganisms thrive and break down the organic materials more efficiently. You can achieve proper aeration by turning the pile regularly, as mentioned earlier.
You can also create air pockets in the pile by ensuring that the materials are not too tightly packed. Loosely layering the materials and avoiding compaction will help maintain good airflow throughout the pile.

Troubleshooting Common Composting Issues
While composting is a relatively straightforward process, it’s not uncommon to encounter a few issues along the way. Here are some common composting issues and how to troubleshoot them.
7.1 Compost Smells Bad
If your compost pile has a foul smell, it may be an indication of improper aeration or excess moisture. A smelly pile could also mean that there is an imbalance in the carbon-nitrogen ratio.
To address this issue, turn the pile more frequently to aerate it and introduce more oxygen. You may also need to add more dry brown materials to absorb excess moisture and balance the ratio. Avoid adding meat, dairy, or oily items, as they can contribute to unpleasant odors.
7.2 Attracting Pests
If your compost pile is attracting pests, such as rodents or insects, it may be due to the types of materials you are adding. Avoid adding meat, dairy, or oily items, as they tend to attract pests.
Consider adding a layer of leaves or straw on top of the compost pile to create a barrier and discourage pests from entering. You can also try burying kitchen scraps deeper into the pile to keep them out of sight and minimize the odor.
7.3 Compost is Not Breaking Down
If your compost pile is not breaking down as quickly as expected, it may be due to an imbalance in the carbon-nitrogen ratio or insufficient moisture.
Check the ratio of green to brown materials and adjust accordingly. If the pile appears to be too dry, add water to increase the moisture content. If it’s too wet, add more dry brown materials to balance it out.
Additionally, ensure that the pile is being turned regularly to promote decomposition and distribute moisture and temperature evenly. Patience is also key, as different materials take varying amounts of time to break down.
Harvesting and Using Your Compost
After weeks or months of composting, your pile will eventually transform into rich, dark compost ready for use in your garden. But how do you know when it’s ready and how should you harvest and use it?
8.1 Knowing When It’s Ready
Compost is ready to be harvested when it has a uniform, crumbly texture and a earthy smell. It should be dark brown or black in color, indicating that it has fully decomposed. Any large pieces or identifiable materials should have broken down completely.
If you’re uncertain about whether your compost is ready, you can perform a simple test. Take a small amount of compost and place it in a jar of water. If the compost sinks to the bottom and the water remains clear, it’s a sign that it is fully decomposed and ready for use.
8.2 Harvesting the Compost
To harvest the compost, start by removing the top layer of unfinished materials and set them aside for further decomposition. Use a garden fork or shovel to carefully scoop the finished compost from the bottom of the pile.
You can sieve the compost to remove any undecomposed materials or use it as is, depending on your preferences and garden needs. Remember to return any unfinished materials to the pile for future decomposition.
8.3 Applying Compost in Your Garden
Compost is a valuable resource that can be used to improve the health and fertility of your garden soil. It provides essential nutrients, improves soil structure, and enhances moisture retention.
Apply the compost to your garden by spreading a layer of 1 to 2 inches over the soil surface. Use a garden rake or hoe to work the compost into the top few inches of soil. This will help ensure that the nutrients are evenly distributed and accessible to the plant roots.
You can also use compost as a mulch around your plants, providing a protective layer that helps suppress weeds, retain moisture, and regulate soil temperature.
Benefits of Composting at Home
Composting at home offers a wide range of benefits, both for you and the environment.
9.1 Environmental Benefits
Composting helps reduce the amount of organic waste that ends up in landfills, where it can generate harmful greenhouse gases. By composting at home, you are diverting waste from the landfill and contributing to the reduction of methane emissions, a potent greenhouse gas.
Composting also reduces the need for synthetic fertilizers, which can have negative environmental impacts. The use of compost enriches the soil naturally and provides a sustainable alternative to chemical fertilizers.
9.2 Soil Improvement
Compost is a valuable amendment that improves soil structure, fertility, and overall health. It provides a balanced blend of nutrients, enhances moisture retention, and promotes beneficial microbial activity in the soil.
The addition of compost can help sandy soils retain water and clay soils become more permeable. It also encourages the growth of beneficial earthworms and other soil organisms, creating a healthy and thriving ecosystem within your garden soil.
9.3 Cost Savings
Composting at home can also lead to cost savings in the long run. By producing your own nutrient-rich compost, you reduce the need to purchase fertilizers and soil amendments. This can add up to significant savings over time, especially if you have a large garden or regularly purchase gardening products.
Compost also helps reduce watering needs by improving moisture retention in the soil. This can lead to savings on your water bill and help conserve this precious resource.
Conclusion
Composting at home is a rewarding and sustainable practice that allows you to transform organic waste into nutrient-rich compost for your garden. By choosing the right composting method, creating a suitable compost bin, collecting the right materials, and properly managing your compost pile, you can create a valuable resource that benefits both your garden and the environment. With time, patience, and a little effort, you’ll be able to enjoy the many benefits of home composting and watch your garden thrive with the help of nutrient-rich compost. So go ahead, start composting, and make a positive impact today!