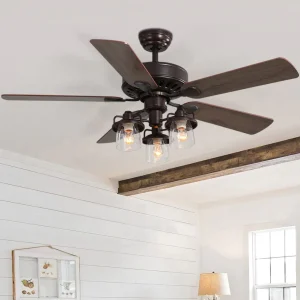
Are you tired of the stuffy air in your bedroom and looking to install a new ceiling fan? Look no further! In this article, we will guide you through the step-by-step process of installing a new ceiling fan in your bedroom. From choosing the right fan to wiring it correctly, we’ve got you covered. So, get ready to transform your bedroom into a cool and refreshing oasis with the help of a brand new ceiling fan! Installing a new ceiling fan in your bedroom can be a great way to improve the comfort and aesthetics of your space. However, it’s important to approach the installation process with caution and follow the necessary steps to ensure a safe and successful installation. In this article, we will guide you through the step-by-step process of installing a new ceiling fan in your bedroom, from checking the ceiling fan specifications to finalizing the installation.
Check the ceiling fan specifications
Before you begin the installation process, it’s crucial to check the specifications of the ceiling fan you have chosen. This includes determining the right size and style for your bedroom, as well as checking for any weight restrictions. Ceiling fans come in various sizes and styles, so it’s essential to choose one that fits the dimensions and decor of your bedroom. Additionally, knowing the weight restrictions will help ensure that your ceiling can safely support the fan you choose.
Determine the mounting type
Ceiling fans can be mounted in different ways, such as flush mount or downrod mount. Flush mount fans are ideal for rooms with low ceilings, as they are mounted directly against the ceiling. On the other hand, downrod mount fans are suitable for rooms with higher ceilings, as they require a downrod to lower the fan to an optimal height. It’s important to determine the mounting type that works best for your bedroom before beginning the installation process.
Gather the necessary tools and equipment
To install a ceiling fan, you will need a few essential tools and equipment. These include a ceiling fan kit, a ladder or step stool, screwdrivers, wire cutters, a circuit tester, and electrical tape. The ceiling fan kit should include all the necessary components for the installation, such as the fan motor, fan blades, and necessary hardware. The ladder or step stool will help you reach the ceiling safely, while the screwdrivers and wire cutters will be used to remove the existing light fixture and connect the new ceiling fan.
Turn off electricity to the existing ceiling light
Before you can begin the installation process, it’s crucial to turn off the electricity to the existing ceiling light. This step ensures your safety and prevents any electrical accidents during the installation. To turn off the electricity, you will need to locate the electrical panel in your home and switch off the circuit that powers the ceiling light. It’s also advisable to use a circuit tester to confirm that the power is off before proceeding.
Remove the existing light fixture
Once you have turned off the electricity, you can proceed to remove the existing light fixture. Start by removing the light bulbs from the fixture. Next, use a screwdriver to unscrew and detach the light fixture from the ceiling. Be cautious when handling the fixture and disconnect any electrical wires that are connected to it. Remember to cap off the wires with wire nuts to ensure safety and prevent any electrical hazards.
Mount the new ceiling fan bracket
After removing the existing light fixture, it’s time to mount the new ceiling fan bracket. Follow the manufacturer’s instructions provided with your ceiling fan kit to ensure a proper installation. The bracket is typically attached to the ceiling using screws. Make sure to securely fasten the bracket to ensure stability and safety for your new ceiling fan.
Assemble the ceiling fan
With the bracket in place, you can now proceed to assemble the ceiling fan. Start by unpacking and laying out all the components of the fan. Begin by connecting the fan motor to the ceiling bracket, following the instructions provided. Once the motor is securely attached, it’s time to attach the fan blades to the motor. Depending on the style of your fan, this step may vary. Finally, if your ceiling fan comes with a light kit, install it according to the instructions provided.
Wire the ceiling fan
Wiring the ceiling fan is a crucial step in the installation process. Begin by connecting the wires from the ceiling to the fan. You will typically have wires of different colors, such as black, white, and green. Match the corresponding wire colors between the ceiling and the fan, ensuring a secure connection. Once the wires are connected, use wire nuts to secure the connections and prevent any loose or exposed wires. Finally, insulate the wire nuts with electrical tape for additional safety.
Attach the fan blades and light kit (if applicable)
After wiring the ceiling fan, it’s time to attach the fan blades and any additional light kit components. Secure the fan blades to the motor using the provided screws, ensuring they are properly aligned. If your ceiling fan comes with a light kit, install any additional components according to the instructions provided. It’s important to tighten all screws securely to ensure the stability and proper functioning of your ceiling fan.
Secure and test the ceiling fan
Before finalizing the installation, take the time to ensure that all connections are secure. Double-check that the fan blades and light kit are properly attached and tightened. Once you are confident in the stability of your ceiling fan, install the light bulbs and test both the fan and light functions. Turn on the electricity and use the appropriate switches to activate the fan and light. Ensure that the fan operates smoothly and quietly, and that the light functions as expected. Additionally, check for any balance issues or wobbling that may require adjustment.
Finalize the installation
If everything checks out during testing, it’s time to finalize the installation. Turn off the electricity again before securing any loose wires or components. Use screwdrivers or other appropriate tools to tighten any loose screws or connections. Finally, take a moment to clean up the work area, removing any debris or packaging materials. Once everything is secure and tidy, you can finally enjoy the comfort and functionality of your new ceiling fan in your bedroom.
Installing a new ceiling fan in your bedroom may seem like a daunting task, but with careful planning and adherence to the proper steps, it can be a relatively straightforward process. By checking the ceiling fan specifications, gathering the necessary tools and equipment, turning off the electricity, removing the existing light fixture, mounting the new ceiling fan bracket, assembling the ceiling fan, wiring it properly, attaching the fan blades and light kit, securing and testing the fan, and finalizing the installation, you can successfully install a new ceiling fan in your bedroom. So, why not enhance the comfort and aesthetics of your space by embracing the cooling breeze and gentle hum of a ceiling fan?