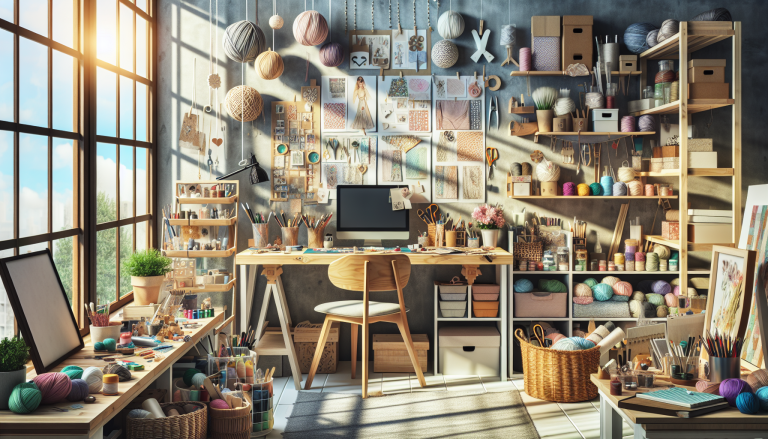
Are you a creative enthusiast looking to create a dedicated space for your DIY craft projects at home? In this article, we will explore various tips and ideas on how you can transform any unused corner or room into a functional and inspiring craft station or workspace. From organizing your supplies to maximizing storage, we’ve got you covered with practical advice that will help you unleash your creativity and make the most out of your creative endeavors at home. So, let’s dive in and discover how you can create a DIY craft station that is both efficient and aesthetically pleasing.
Choosing the Right Space
Evaluate available space
When creating a DIY craft station or workspace in your home, it’s important to start by evaluating the available space. Consider the size and layout of the room or area where you plan to set up your craft station. Take measurements to ensure that you have enough space to comfortably work and store your craft supplies. Keep in mind that you’ll need enough room to accommodate a table or desk, seating, and storage solutions.
Consider natural light
Natural light can make a world of difference in a craft space. When choosing a location for your DIY craft station, consider how much natural light the area receives. Position your craft table or desk near a window if possible, as this will provide ample light and create a pleasant working environment. Natural light not only enhances your creativity but also reduces eye strain while you are working on intricate projects.
Think about storage options
One of the most important considerations when setting up a DIY craft station is storage. You want to have easy access to all your craft supplies while keeping your workspace organized. Consider the different storage options available, such as shelves, drawers, and bins. Take stock of your craft supplies and determine what type of storage solutions will work best for your needs. Having a designated place for each item will ensure that your space remains clutter-free and functional.
Selecting Essential Furniture
Choose a sturdy table or desk
A sturdy table or desk is the centerpiece of any craft station. Look for a table or desk that provides ample workspace and is made from durable materials. It should be able to withstand the weight of your projects and provide a stable surface for cutting, painting, and other crafts. Consider the dimensions of the table or desk to ensure that it fits comfortably in your chosen space.
Pick comfortable seating
Comfortable seating is essential to ensure that you can focus on your projects for extended periods without discomfort or strain. Choose a chair with proper back support and cushioning to provide ergonomic comfort. Adjustable height and tilt options are also beneficial to accommodate various tasks. Remember, your craft station is a place where you can unwind and enjoy your creativity, so make sure your chair offers the necessary comfort and support.
Consider additional storage solutions
In addition to a table or desk, you may want to consider additional storage solutions to keep your craft supplies organized and within easy reach. Look for storage options that fit your available space, such as shelves, drawers, or bins. Wall-mounted shelves can provide extra storage without taking up valuable workspace. Utilize vertical space and incorporate storage solutions that suit your specific needs, ensuring that everything has its place.

Organizing Craft Supplies
Sort and categorize your supplies
Before setting up your DIY craft station, it’s important to sort and categorize your craft supplies. Take inventory of what you have and group similar items together. This will allow you to easily locate specific materials when you need them. Consider organizing items by type (e.g., paints, fabrics, beads) or by project (e.g., scrapbooking, sewing, jewelry making). By having a clear organizational system in place, you’ll save time and frustration searching for supplies.
Invest in storage containers
Investing in high-quality storage containers is a game-changer when it comes to organizing your craft supplies. Look for containers that are sturdy, stackable, and transparent. Clear containers allow you to easily see what’s inside without having to search through multiple boxes. Consider using smaller containers or dividers within larger ones to further categorize and separate your supplies. This will help you maintain a neat and efficient workspace.
Label everything for easy access
Labeling your storage containers is an important step in maintaining an organized craft station. Use labels or tags that clearly identify the contents of each container. Labeling not only helps you find what you need quickly but also makes it easier to put things back in their rightful place. Consider using a label maker or waterproof markers for durability. By labeling everything, you’ll be able to locate your supplies with ease and maintain a clutter-free workspace.
Setting Up Adequate Lighting
Opt for task lighting
Task lighting is essential for a DIY craft station as it provides focused illumination for detailed work. Consider investing in a desk lamp with adjustable brightness settings so that you can customize the lighting to your specific needs. Look for a lamp that provides even illumination without casting shadows on your work surface. LED lights are energy-efficient and provide a bright, clear light that closely mimics natural daylight, making them an excellent choice for craft projects.
Consider natural light sources
While artificial lighting is important, don’t underestimate the power of natural light in your craft space. Position your craft table or desk near a window to take advantage of the natural sunlight. Natural light not only enhances color accuracy but also improves your mood and boosts creativity. However, be mindful of any glare or direct sunlight that may cause eye strain or make it difficult to see your projects. Consider using curtains or blinds to control the amount of natural light entering your space.
Use adjustable lighting options
To create a versatile and adaptable craft space, consider using lighting options that can be adjusted to fit different tasks and moods. Install dimmer switches or use lamps with adjustable angles to create the perfect ambiance for your projects. Having lighting options that can be easily modified ensures that you have the right amount of illumination for various crafts, whether you’re working on fine details or large-scale designs.

Creating a Functional Layout
Arrange furniture for easy access
To optimize your DIY craft station, arrange your furniture in a way that promotes easy access to all areas of your workspace. Position your table or desk so that you have ample room to move around without obstacles. Consider the flow of your movements while working and ensure that your chair and other furniture do not block your path. By arranging your furniture thoughtfully, you’ll have a functional layout that allows for seamless crafting.
Create separate zones for different activities
If you indulge in multiple crafts, consider creating separate zones within your craft space for different activities. Designate specific areas for sewing, painting, and other crafts based on your preferences and the available space. This segmentation will help you stay organized and focused on each craft without cluttering up your entire workspace. It’ll also save you time when you’re searching for particular tools or materials related to a specific craft.
Ensure proper workflow
When setting up your DIY craft station, it’s important to consider the workflow of your crafting process. Arrange your tools and materials in a way that makes sense and minimizes unnecessary movement. Keep frequently used items within arm’s reach and place less frequently used items in dedicated storage areas. By organizing your space in a way that supports your workflow, you’ll be able to work more efficiently and enjoy the creative process.
Adding Personal Touches
Decorate the space with inspiring artwork
Add a touch of personalization to your DIY craft station by decorating the area with inspiring artwork. Hang up your favorite pieces of art or display creations that you’re particularly proud of. This will not only make your craft space feel more inviting but also provide you with constant inspiration. Whether it’s a painting, a motivational quote, or a photograph, surrounding yourself with visuals that resonate with you will help get your creative juices flowing.
Incorporate plants for a touch of nature
Bringing nature indoors is a great way to create a fresh and vibrant atmosphere in your craft space. Consider incorporating plants or flowers into your DIY craft station. Not only do plants add a touch of greenery and beauty, but they also improve air quality and create a calming environment. Choose low-maintenance plants that thrive in indoor conditions and place them strategically around your workspace to create a refreshing and lively atmosphere.
Use color schemes that inspire creativity
Color has a profound impact on our mood and creativity. Choose a color scheme for your craft space that sparks inspiration and energizes your creative process. Some colors, such as blue and green, are known to promote relaxation and focus, while others like yellow and orange can enhance enthusiasm and creativity. Experiment with different color palettes and find the combination that resonates with you the most. Incorporate these colors into your furniture, storage containers, or decorative elements to create a visually appealing and inspiring environment.
Maximizing Storage Solutions
Utilize wall space with shelves or pegboards
When it comes to maximizing storage in your DIY craft station, don’t forget about the wall space. Install shelves or pegboards on the walls to hold various supplies and tools. This will free up valuable space on your table or desk and keep your supplies within easy reach. Use the shelves to display decorative items or frequently used tools, while pegboards can hold small baskets or hooks to hang scissors, brushes, and other essentials. By utilizing the vertical space, you’ll maximize storage without sacrificing workspace.
Consider using stackable storage containers
Stackable storage containers are a fantastic option for maximizing storage in a small craft space. Look for containers that fit well together and can be easily stacked or nested when not in use. This allows you to utilize vertical space efficiently while keeping your supplies neatly organized. Stackable containers are also convenient if you have limited shelf or cabinet space as they allow you to store multiple items in a compact and organized manner.
Make use of underutilized spaces
In a craft space, every inch counts. Take advantage of underutilized spaces to maximize storage. For example, consider utilizing the space under your table or desk by adding rolling drawers or bins. These can provide additional storage for bulkier items or materials that are not used as frequently. You can also use the vertical space behind doors by installing hooks or over-the-door organizers to hang tools, ribbons, or other craft supplies. By thinking creatively and utilizing all available spaces, you’ll be amazed at how much storage you can squeeze into your DIY craft station.
Keeping the Workspace Organized
Establish a daily cleaning routine
To maintain a functional and inspiring craft space, it’s important to establish a daily cleaning routine. Dedicate a few minutes each day to tidy up your workspace, organize any supplies or tools that are out of place, and wipe down your table or desk. By making cleaning a regular habit, you’ll prevent clutter from accumulating and ensure that you always have a clean and inviting space to work in.
Create dedicated spaces for frequently used items
Frequently used items should have dedicated spaces in your craft station. This includes tools, supplies, and materials that you use on a daily basis. By assigning specific spots for these items, you’ll always know where to find them, reducing the time spent searching for what you need. Keep these items within arm’s reach or in easily accessible storage containers. By maintaining a designated space for frequently used items, you’ll keep clutter at bay and improve your overall efficiency.
Implement a system to avoid clutter
Clutter can quickly take over a craft space if not managed properly. Implement a system to avoid clutter from accumulating. For example, after you finish a project, put away any unused materials immediately. Avoid leaving half-finished projects strewn across your workspace and designate a specific area to store ongoing projects. Regularly go through your supplies and remove any items that are no longer needed. By maintaining a clutter-free environment, you’ll create a more peaceful and enjoyable crafting experience.
Including Ergonomic Elements
Choose a chair with proper back support
The importance of ergonomics cannot be overstated when setting up a DIY craft station. Your chair, in particular, plays a crucial role in maintaining good posture and preventing discomfort or injury. Choose a chair that offers proper back support, preferably one with an adjustable backrest. Your chair should allow you to sit with your feet flat on the floor and your knees at a 90-degree angle. Ergonomic chairs are designed to support the natural curve of your spine and promote healthy posture, ensuring that you can craft for hours without strain.
Set the table at the right height
The height of your table or desk also affects your comfort and posture while crafting. Make sure the table is set at the right height for your needs. Ideally, your elbows should be at a 90-degree angle when you’re sitting at your craft station. If your table is too high, consider using an adjustable chair or adding a footrest. If it’s too low, raise it using risers or adjustable table legs. Finding the right table height will prevent unnecessary strain on your back, neck, and shoulders, allowing you to work comfortably for extended periods.
Invest in ergonomic tools and accessories
In addition to a comfortable chair and properly positioned table, consider investing in ergonomic tools and accessories to further enhance your crafting experience. Look for ergonomic scissors, cutting mats, and other tools that are designed to reduce strain on your wrists and hands. Use a wrist rest or keyboard tray if you spend a lot of time at a computer during your crafting process. Ergonomic accessories such as lumbar pillows or wrist guards can also provide additional support and prevent injuries. By investing in ergonomic tools and accessories, you prioritize your comfort and well-being while bringing your creative ideas to life.
Inspiring Creativity in Your Space
Display finished projects for inspiration
Displaying your finished projects in your craft space is a great way to inspire creativity and showcase your accomplishments. Arrange your completed works on shelves, bulletin boards, or wall-mounted displays. This not only serves as a reminder of your creative abilities but also provides motivation for future projects. Surrounding yourself with visible evidence of your achievements will stimulate fresh ideas and encourage you to continue exploring different crafts and techniques.
Create a pinboard or inspiration wall
A pinboard or inspiration wall is a fantastic tool to fuel your creativity. Collect magazine clippings, photographs, or other items that inspire you and pin them to a dedicated board on your craft space wall. This can be a mix of color palettes, patterns, and images that resonate with your personal style and interests. Use the pinboard as a source of inspiration when you’re feeling stuck or need ideas for your next project. Updating the board regularly with fresh visuals will keep your creative energy flowing.
Incorporate a mood board to brainstorm ideas
A mood board is a valuable resource for brainstorming and generating new ideas for your craft projects. Create a dedicated space in your craft station where you can pin or display different materials, textures, fabric swatches, and other items that reflect the aesthetic or theme you’re aiming for. It’s a creative visual representation that can help you conceptualize and plan your projects. Don’t be afraid to experiment and mix and match various elements on your mood board to discover exciting combinations that spark your imagination.