So, you’ve decided it’s time to upgrade your bathroom with a new showerhead and faucet, but you’re not quite sure where to start. Don’t worry, we’ve got you covered! In this article, we’ll guide you through the process of installing a new showerhead and faucet in your bathroom. From choosing the right products to the step-by-step installation process, we’ll provide you with all the information you need to transform your bathroom into a haven of relaxation and style. So grab your tools and get ready to give your bathroom a fresh new look!

Gathering Tools and Materials
Choosing a new showerhead and faucet
Before you begin the installation process, it’s important to choose the right showerhead and faucet for your bathroom. Consider factors such as design, water pressure, and functionality. There are various types of showerheads available, including rain showerheads, handheld showerheads, and dual showerheads. Similarly, faucets come in different styles, such as single-handle or double-handle options. Take your time to explore different options and select the ones that best suit your preferences and needs.
Gathering necessary tools
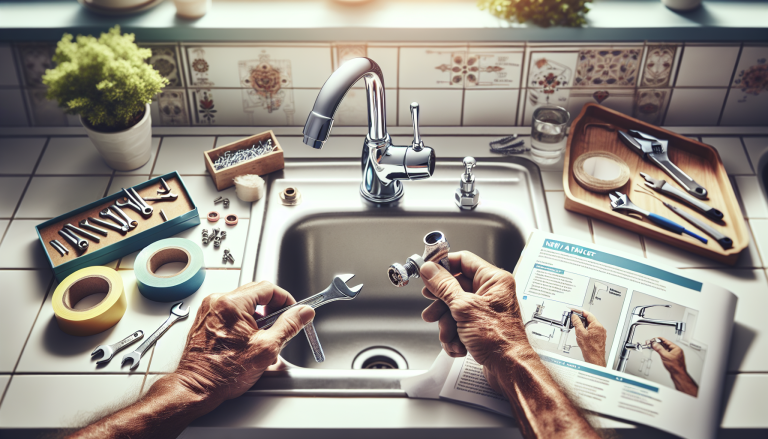
To successfully install a new showerhead and faucet, you’ll need to gather a few essential tools. These tools typically include an adjustable wrench, pliers, pipe wrench, screwdriver, Teflon tape, plumber’s tape, and a bucket or towels to catch any water that may spill during the process. Having these tools on hand will make your installation process much smoother and more efficient.
Preparing the workspace
Before you begin removing the existing showerhead and faucet, it’s important to prepare the workspace to avoid any unnecessary mess or damage. Start by protecting the surrounding area with towels or a dropcloth to catch any debris or water. It’s also a good idea to turn off the water supply to prevent any unwanted leaks or accidents. Make sure to have a clear working space so that you can easily access and maneuver around the shower area.
Removing the Existing Showerhead and Faucet
Turning off the water supply
To ensure a safe and clean removal process, it’s crucial to turn off the water supply before you start removing the existing showerhead and faucet. Locate the main water supply valve, usually located near the water meter or in the basement, and turn it off. This will prevent any water from flowing while you work on the installation.
Removing the showerhead
Once the water supply is turned off, it’s time to remove the showerhead. Start by unscrewing the showerhead from the shower arm. You may need to use an adjustable wrench or pliers to loosen the connection. Be careful not to apply too much force to avoid damaging the plumbing or shower arm. Once the showerhead is removed, set it aside for disposal or future use if it’s still in good condition.
Removing the old faucet
After removing the showerhead, it’s time to remove the old faucet. Begin by turning off the water supply valves under the sink or near the faucet. Once the water supply is shut off, use a wrench or pliers to disconnect the water supply lines from the faucet. Then, remove any mounting nuts or bolts that are securing the faucet in place. Once all the connections are disconnected, you can easily lift the old faucet away from the sink or countertop.
Preparing the New Showerhead and Faucet
Inspecting the new showerhead and faucet
Before you start assembling and installing the new showerhead and faucet, take a moment to inspect them for any defects or damages. Check for any missing parts or components and ensure that everything is in good working condition. If you notice any issues, contact the manufacturer or retailer to resolve them before proceeding with the installation.
Assembling the showerhead
Next, it’s time to assemble the new showerhead. Follow the manufacturer’s instructions to ensure correct assembly. Typically, this involves connecting the showerhead to the shower arm and tightening the connection by hand. Avoid using excessive force as it may cause damage. If necessary, use a wrench or pliers to secure the connection, being careful not to overtighten.
Assembling the faucet
Similarly, you’ll need to assemble the new faucet according to the manufacturer’s instructions. This may involve connecting the handles, spout, and other components. Make sure to read the instructions carefully and follow the recommended steps to ensure a proper and secure assembly. Take your time during this process to prevent any mistakes or future issues.
Installing the New Showerhead
Attaching the shower arm
To install the new showerhead, start by attaching the shower arm to the plumbing pipe in the wall. Apply plumber’s tape or Teflon tape to the threads of the shower arm to create a watertight seal. This will prevent any leaks or water seepage. Hand-tighten the shower arm onto the plumbing pipe, making sure it is secure but not overly tight.
Using plumber’s tape
Before attaching the showerhead, it’s important to use plumber’s tape or Teflon tape on the threads of the shower arm. This tape helps create a tight seal and prevents any leaks. Wrap the tape around the threads in a clockwise direction, ensuring that it covers the entire threaded area. Be generous with the tape, as it will help ensure a secure and leak-free connection.
Attaching the showerhead
Once the plumber’s tape is applied, it’s time to attach the new showerhead. Screw the showerhead onto the shower arm, turning it clockwise until it is securely tightened. Use a wrench or pliers if necessary, but be careful not to overtighten and potentially damage the shower arm or showerhead. Once the showerhead is attached, give it a gentle tug to confirm that it is secure.

Installing the New Faucet
Installing the faucet base
To install the new faucet, start by placing the faucet base onto the sink or countertop. Align it with the mounting holes and use a screwdriver or wrench to secure it in place. Follow the manufacturer’s instructions for specific installation steps, as they may vary depending on the faucet model. Make sure the base is installed securely to prevent any wobbling or movement.
Connecting the water supply lines
With the faucet base secured, it’s time to connect the water supply lines. Most faucets come with pre-attached supply lines, but if not, you’ll need to connect them yourself. Use plumber’s tape or Teflon tape on the threads of the supply lines to ensure a watertight seal. Then, connect the supply lines to the corresponding hot and cold water valves under the sink or countertop. Use an adjustable wrench to tighten the connections, being careful not to overtighten and potentially damage the supply lines or valves.
Testing for leaks
After connecting the water supply lines, it’s crucial to test for any leaks before finalizing the installation. Turn on the water supply valves and run both hot and cold water. Check for any water drips or leaks around the faucet base, supply line connections, or any other areas. If you notice any leaks, tighten the connections slightly and retest. If the leaks persist, you may need to dismantle and reassemble the faucet or consult a professional plumber for assistance.
Finalizing the Installation
Cleaning up the workspace
Once the new showerhead and faucet are installed and tested, it’s time to clean up the workspace. Remove any towels or dropcloths used to protect the surrounding area and wipe down any surfaces that may have accumulated dirt or debris during the installation process. Dispose of any old parts or packaging material properly. Leaving a clean and tidy workspace not only improves the aesthetics but also ensures that no debris interferes with the functionality of the newly installed showerhead and faucet.
Testing the showerhead and faucet
Before you can consider the installation complete, it’s important to test the functionality of the new showerhead and faucet. Turn on the water supply and run both hot and cold water to ensure proper flow and temperature control. Test the showerhead for different spray settings or functions if applicable. Additionally, check that the faucet handles or knobs operate smoothly without any stiffness or resistance. Address any issues or concerns immediately to ensure a satisfactory and efficient performance from your new showerhead and faucet.
Making any necessary adjustments
If during the testing phase you notice any issues or areas for improvement, don’t hesitate to make the necessary adjustments. This could involve tightening loose connections, adjusting water pressure or temperature, or even replacing defective parts. Follow the manufacturer’s instructions or consult with a professional plumber if needed. Taking the time to fine-tune and optimize your new showerhead and faucet will ensure a pleasant and enjoyable showering experience for years to come.
Troubleshooting
Addressing leaks
One of the most common issues when installing a new showerhead and faucet is the occurrence of leaks. If you notice any leaks during testing or regular use, it’s important to address them promptly. Start by checking the connections and supply lines for any loose fittings. Tighten them as needed, taking care not to overtighten. If the leaks persist or if they originate from deeper within the plumbing system, it may be best to consult a professional plumber to identify and resolve the underlying cause.
Dealing with low water pressure
Low water pressure can affect the performance of both the showerhead and faucet. If you experience low water pressure, there are a few things you can try. First, check that the water supply valves are fully open. If they are, remove and clean the aerator in the faucet spout, as it may be clogged with debris. Additionally, check for any kinks or blockages in the water supply lines. If these troubleshooting steps do not improve the water pressure, it may be necessary to consult a plumber to assess and address the issue.
Fixing improper installation
In cases where the showerhead and faucet were improperly installed and are not functioning correctly, it’s essential to take corrective action. If you suspect an installation error, start by reviewing the manufacturer’s instructions and comparing the installation to the recommended steps. Double-check all connections and ensure they are secure and tight. If you are unable to identify or resolve the issue, do not hesitate to seek professional help. A licensed plumber can assess the installation and make the necessary adjustments or repairs to ensure proper functionality.
Safety Precautions
Turning off the water supply
One of the most important safety precautions when installing a new showerhead and faucet is to turn off the water supply. This avoids any unexpected water flow or leaks that may cause damage or accidents during the installation process. Locate the main water supply valve and shut it off before beginning any work. Remember to also turn off any additional valves near the faucet or showerhead to ensure complete water shutdown.
Using caution when handling tools
When working with tools during the installation process, it’s crucial to exercise caution and prioritize safety. Always use the correct tools for the job and follow the manufacturer’s instructions for proper usage. Be mindful of sharp edges or moving parts that may cause injuries. Wear protective gloves or eyewear if necessary, and always handle tools with care. If you are unsure about using a specific tool or technique, consider consulting a professional or seeking guidance from an experienced individual.
Checking for electrical hazards
In some cases, the installation of a new showerhead and faucet may involve working in close proximity to electrical outlets or fixtures. It’s important to be aware of any potential electrical hazards and take appropriate precautions. Never operate electrical tools or touch electrical components with wet hands. If you are uncertain about the electrical setup or have concerns about safety, it is best to consult a qualified electrician to ensure proper wiring and avoid any electrical accidents.
Going for Professional Installation
Considering professional help
While installing a new showerhead and faucet can often be done as a DIY project, there are instances where professional help may be necessary or beneficial. If you lack the necessary tools, skills, or confidence to perform the installation yourself, hiring a professional plumber can save you time, effort, and potential mistakes. Additionally, if you encounter any unexpected challenges or issues during the installation process, a professional will have the expertise to address them quickly and effectively.
Finding a reliable plumber
When seeking professional help for your showerhead and faucet installation, it’s important to find a reliable and trustworthy plumber. Start by asking for recommendations from friends, family, or neighbors who have had similar projects done. Research and read online reviews for local plumbers to gauge their reputation and quality of work. Request quotes from multiple professionals and compare their rates, experience, and availability. Ultimately, choose a plumber who not only meets your requirements but also provides excellent customer service and guarantees their work.
Understanding the costs
Before hiring a professional plumber, it’s essential to have a clear understanding of the costs involved. The pricing for showerhead and faucet installations can vary depending on factors such as the complexity of the job, the location, and the specific plumber’s rates. Ask for a detailed estimate or quote that outlines all the expenses, including labor, materials, and any additional charges like travel or permit fees. Compare quotes from multiple plumbers to ensure you are getting a fair price for the services provided.
Maintenance and Care Tips
Regular cleaning
To keep your new showerhead and faucet looking and functioning their best, regular cleaning is essential. Use a mild soap or bathroom cleaner and a soft cloth or sponge to remove any dirt, soap scum, or mineral deposits that may accumulate over time. Be cautious not to use abrasive cleaners or tools that may scratch or damage the surfaces. Proper cleaning helps maintain the aesthetics and functionality of your showerhead and faucet, promoting a hygienic and enjoyable showering experience.
Checking for leaks
Regularly checking for any signs of leaks is crucial to prevent water wastage and potential damage to your bathroom. Inspect the connections and supply lines around the showerhead and faucet periodically. Look for any visible water drips, moisture, or discoloration that may indicate a leak. If you notice any leaks, address them promptly to avoid further complications. Tighten loose connections or replace faulty parts as needed. Early intervention can prevent water damage and the need for costly repairs down the line.
Replacing parts as needed
Over time, certain parts of your showerhead and faucet may wear out or become damaged. It’s important to keep an eye on the condition of these components and replace them as needed. This can include items like washers, O-rings, cartridges, or aerators. Refer to the manufacturer’s instructions or consult a professional plumber for guidance on finding and replacing the specific parts for your showerhead and faucet. Regular maintenance and parts replacements will prolong the lifespan and functionality of your fixtures, ensuring a reliable and pleasant showering experience for years to come.