So you’ve been eyeing that empty wall in your living room, and you’ve decided that a DIY floating shelf is just what it needs. But where do you start? Don’t worry, building a floating shelf doesn’t have to be daunting. In fact, it can be quite an enjoyable and rewarding project! In this article, we’ll walk you through the step-by-step process of building your own DIY floating shelf, so grab your tools and let’s get started!
Choosing the Materials and Design
Selecting the type of wood
When it comes to building a DIY floating shelf for your living room, the first step is selecting the type of wood you want to use. The type of wood you choose will depend on your personal preference and the overall style of your living room. Popular options for floating shelves include pine, oak, and birch. Each type of wood has its own unique characteristics, so consider factors such as durability, grain pattern, and color when making your decision.
Determining the dimensions
Once you have chosen the type of wood, it’s time to determine the dimensions of your floating shelf. Consider the available space in your living room and how you want the shelf to fit within that space. Measure the length and depth of the desired shelf, ensuring it will be able to hold the items you plan to display on it. Additionally, consider the weight capacity you would like the shelf to have, as this may impact the thickness and design of the wood.
Deciding on the design
Now that you have chosen the type of wood and determined the dimensions of your floating shelf, it’s time to decide on the design. Floating shelves can be as simple or as elaborate as you desire. Consider whether you want a clean and minimalist look or if you prefer a more decorative design. You can choose to have straight edges or add unique shapes and angles. The design of your floating shelf should complement the overall style of your living room while also reflecting your personal taste.
Gathering the Tools and Supplies
Essential tools
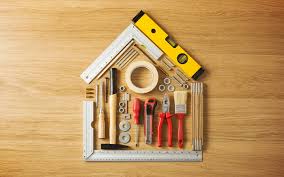
Before you begin the construction of your DIY floating shelf, it’s important to gather all the necessary tools. Some of the essential tools you will need include a measuring tape, a stud finder, a level, a saw (such as a circular saw or a jigsaw), a drill, screws, and a screwdriver. These tools will help you accurately measure, cut, and assemble the materials needed for your floating shelf.
Additional supplies
In addition to the essential tools, you may need some additional supplies to complete your DIY floating shelf project. These supplies can include sandpaper or a sanding block for smoothing out rough edges, a paintbrush or roller if you plan on painting or staining the wood, and wood glue for added stability. Depending on your chosen design and personal preferences, you may also want to consider adding decorative elements such as wood stain, varnish, or decorative brackets.

Measuring and Marking
Taking accurate measurements
Taking accurate measurements is crucial to ensure that your floating shelf fits perfectly in your living room. Use a measuring tape to measure the length, width, and depth of the desired shelf. It’s important to measure multiple times to ensure accuracy. Measure the space on the wall where you plan to install the shelf, taking into account any existing furniture or fixtures that may impact the placement.
Marking the wall and shelf
After you have taken accurate measurements, use a pencil to mark the wall and the shelf according to the dimensions you have determined. Start by marking the desired height of the shelf on the wall, ensuring it is level. Then, transfer these measurements onto the wood you have selected for the shelf. Use a straight edge or a level to create straight lines for cutting.
Locating and Marking Studs
Using a stud finder
Before you can attach your floating shelf to the wall, it’s important to locate and mark the studs in the wall. Studs provide the necessary support and stability for your shelf. Use a stud finder to locate the studs behind the wall. Move the stud finder along the wall, following the manufacturer’s instructions, until it indicates the presence of a stud. Then, mark the location of the stud using a pencil.
Marking the stud locations
Once you have located and marked the studs using a stud finder, it’s time to transfer these markings onto the wall. Use a pencil to accurately mark the stud locations, ensuring they align with your desired shelf height and width. These markings will serve as a guide when attaching the support brackets and securing the shelf to the wall.

Cutting the Wood
Preparing the cutting area
Before you begin cutting the wood for your floating shelf, it’s important to prepare a suitable cutting area. Find a flat and stable surface, such as a workbench or sawhorses, to set up your cutting station. Ensure that the area is well-lit and free from any potential hazards. Consider using clamps or other securing methods to hold the wood in place during cutting.
Measuring and marking the wood
Using the measurements and markings you made earlier, transfer the dimensions onto the wood you have chosen for your floating shelf. Use a measuring tape and a pencil to mark the desired length and depth of the shelf. Double-check these measurements before proceeding to the next step.
Using a saw to make the cuts
Once you have accurately marked the wood, it’s time to make the necessary cuts. Depending on the thickness and complexity of your design, you may need a circular saw or a jigsaw. Follow the marked lines carefully, ensuring smooth and straight cuts. Take your time and work slowly, especially if you are new to using power tools. Remember to wear appropriate safety gear, such as safety glasses and gloves, during this step.
Sanding and Finishing the Wood
Sanding the rough edges
After cutting the wood for your floating shelf, it’s common for the edges to be rough. To ensure a professional-looking finish, use sandpaper or a sanding block to smooth out any rough edges. Start with coarse-grit sandpaper and gradually move to finer-grit sandpaper for a smooth and polished result. Sand in the direction of the wood grain for the best results.
Applying a finish or paint
Once the wood is sanded and smooth, you can choose to apply a finish or paint to enhance its appearance and protect it from wear and tear. Apply wood stain or varnish to bring out the natural beauty of the wood, or use paint for a more vibrant and colorful look. Follow the manufacturer’s instructions for the specific finish or paint you choose, ensuring proper drying time between coats.
Attaching the Support Brackets
Determining the spacing
Before attaching the support brackets to the wall, it’s important to determine the spacing between them. The spacing will depend on the length and weight capacity of your floating shelf. As a general guideline, it’s recommended to place the support brackets approximately 16-24 inches apart. However, adjust this spacing as needed based on the specific requirements of your shelf design.
Attaching the brackets to the wall
Once you have determined the spacing, use a drill to attach the support brackets to the wall. Align the brackets with the previously marked stud locations and use screws to secure them in place. Ensure that the brackets are level and securely anchored to provide adequate support for your floating shelf.
Mounting the Shelf
Positioning the shelf on the brackets
With the support brackets securely attached to the wall, it’s time to position the shelf onto the brackets. Carefully place the wood shelf onto the brackets, ensuring that it aligns with the markings and support brackets. Adjust the position as needed to achieve the desired height and placement.
Securing the shelf to the brackets
Once the shelf is properly positioned on the support brackets, secure it in place using screws or other appropriate fasteners. Depending on your chosen design, you may need to attach the shelf from underneath or through the sides. Use a drill or screwdriver to drive the screws into the wood, ensuring a tight and secure fit.
Adding Extra Support
Considering additional support options
After mounting the shelf on the support brackets, it’s important to consider whether additional support is needed. Depending on the weight capacity of your floating shelf and the items you plan to display, you may want to add extra support for added stability. Consider options such as corner braces, support brackets, or additional anchors to reinforce the shelf.
Installing extra support if needed
If you have determined that extra support is necessary, follow the manufacturer’s instructions to install the chosen support option. This may involve attaching additional brackets or using anchors to secure the shelf to the wall. Ensure that the extra support is evenly distributed and properly aligned with the existing support brackets.
Final Touches and Decorative Elements
Adding decorative elements
Once the floating shelf is securely in place, it’s time to add the final touches and decorative elements. This is where you can let your creativity shine and personalize the shelf to match your living room’s style. Consider adding decorative brackets, trim, or embellishments to enhance the overall aesthetic. You can also incorporate decorative items such as plants, picture frames, or books to make the shelf truly your own.
Making final adjustments
Before considering the project complete, take some time to make final adjustments and ensure that everything is level, secure, and visually appealing. Check that the shelf is straight and evenly positioned. Make any necessary tweaks to the placement or alignment of decorative elements. Step back and admire your handiwork, knowing that you have successfully built a beautiful and functional DIY floating shelf for your living room.